Tuesday, February 24, 2009

Make your own Terrarium!
A project that has been around forever, but now has taken on new life in the home decor world. I love terrariums! If your lazy you can always head on over to the high-end florist and have one made for you, I personally am to cheap. I am here to show you it can be cheap, fun, and you don't need a green thumb to do it.


Materials: Glass container - I like to search the local thrift stores for weird jars, but you can find some inexpensive jars with lids at Target or any other local department store.

Gravel- you can get gravel at the hardware store or just pull some off your driveway, but remember to wash it before you use it.

Charcoal- You can get this at the grocery store or hardware store.

Sand or Soil- depending on the plant life you choose, you will need sand or soil. Sand for desert plants, and soil for succulents. All can be purchased at home& garden stores.

Plants- pick plants that will work well in this environment (mini cacti, jade plants, ivy, small palms, mini begonia, moss, and ferns)

Optional- rocks or other little statues or Dode-dads.

Step 1) wash glass container you plan to use

Step 2) add one layer of gravel, then a layer of charcoal, now a a-2 inch layer of sand or soil.

Step 3) Now it is time to add your plants. A good tool is a pair of chopsticks to help you poke plants into soil. Remember to use thick rubber or leather gloves for handling cacti.

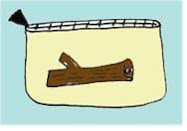
Step 4) Add any little nik-naks or rocks at this time. I added a cute little plastic deer to live in mine :)

Now your terrarium is finished. Remember to place terrarium in a place that has suitable light for your plants. Also keep in mind some plants do not like terrarium lids (like cacti) .

Watering your terrarium: A good watering once every 2 weeks is enough. Soil should dry out between watering's for dry climate plants. Succulents require the least amount of watering. Usually the lid will keep in moisture making the terrariums a self contained eco-system.

Have fun and happy planting!

Cheers

xoxox

Monday, February 23, 2009

Happy Monday!
I hope everyone had a fabulous weekend. Mine was filled with studio time, lounging and some shopping. So in all it was a pretty relaxing weekend. Last week was my Birthday and so I had some extra monies from relatives and decided to make myself spend it on ME. What usually happens is I get money and spend it on my business or my Son (who at this time is spoiled beyond belief). So this Birthday I only bought stuff for myself, which was hard because I don't "need" anything.
My Achilles heal is the bookstore. I can not enter a bookstore without buying something. I have a book addiction of sorts. A couple of years ago My Husband and I had to part with some of our book collection and it broke my heart. Now we have tons of room and I feel my old book collecting ways creeping back!
Over the weekend we made a trip to Borders book store and I found some delightful reads! Stuffed magazine is a specialty magazine that only comes out ever so often. It is filled with amazing plushies and dolls by awesome artist! I also had to buy Craft magazine in honor of their last issue. Plus Amy Sedaris was on the cover and I adore her! Last but not least I found this awesomely funny and adorable book by Aranzi Aronzo. The book is called Aranzi Machine Gun vol.1. It is filled with super cute comic strips and crafty projects!

♥♪♥♫♥♪♥♫♥
I leave you today with a peak at my messy and total in need of reorganization desk. I can't wait until my studio is finished. Oh I guess a girl can dream!
Remember to wear a scarf, its windy out there!
Cheers!
xoxo

Tuesday, February 17, 2009


Shaving Cream marbling

Step 1) Layer about 1 inch of shaving cream onto a baking dish or pan.
Step 2)Level it out with a piece of cardboard as a scraper

Step 3)Use water based paint or food coloring. I used the little bottles of liquid food coloring . Drip some food coloring or paint directly on top of the shaving cream. Use different compositions like concentric circles, stripes, half moons. etc.

Step4) Using the back of the brush or a pointed stick or tooth pick. Swirl the paint. Do not push it down deep into the shaving cream. The paint will stay on the top.

Step 5) Pick a paper that fits your baking dish, and is some what thick . Lay paper on top of the design and press down. Pull the paper off. The shaving cream will appear to be all smeared but wait.
Step 6) Use the piece of poster board to scrape off the excess shaving cream. Like magic the design stays on the paper.
**********
This project is safe for all ages! It can be a tad bit messy, but has amazing results! Hope everyone has fun making some funky stationery!
Cheers!
xoxo

Tuesday, February 10, 2009


Hi! Its Tuesday again and that means it is DIY tutorial Tuesday! So today I am feeling rather down in the dumps. It is gloomy just a all around ick kind of day. So I have picked a project that makes me think of Spring and all the fun things one can find on a sunny stroll through the woods.
Animal track casting:


I also love the pictures and diagrams from this old book. It looks like it is from the 50's! Have fun!

Cheers!

Monday, February 09, 2009

I hope everyone had a lovely weekend. Mine was spent sewing and puttering around the house. The sun has finally decided to show its face and it has made me very happy. I don't enjoy the Hot, but I love the sun if that makes any sense? Anyways, it puts me in the mood for cleaning out clutter and organization. It also helps me jump start work and projects I have going on. I wish the weekends stayed a while longer. It feels like they go out with the breeze...

Here are some lovely garments I found while browsing this weekend. They are both from Tulle and I adore them! To be truthful almost everything in this shop is amazing! Just looking at these lovelies has kick started me into exercise to rid of those winter chunkies. The retro feel just makes me swoon!
So stop on over to Tulle and take a wonder, you will not be disappointed!
****
ok, off I go to sew and clean up the weekend family messiness! Remember to stop by tomorrow for the new Tuesday DIY project!
Cheers!
xoxo


Tuesday, February 03, 2009

This will be the start to my DIY series hopefully happening every Tuesday. I hope to include ideas, and instructions to craft/art projects for every level of expertise.

Rub on decals/stickers

You will need : a computer, printer, transparency film( the clear plastic sheets for over head projectors), hairspray, Popsicle stick

Step 1: Make some images (or scan in a drawing) on your computer that you would like to see in decal/sticker form. Use a software program (photoshop, gimp, picnik) to create a mirror image of your drawing. You must remember this step or your drawings will print backwards.

Step 2 : Spray transparency film with a light mist of hairspray. Make sure to cover the entire sheet, but not to much (no dripping). Leave sheet to dry for an hour.

Step 3: After your transparency sheet is dry, insert it into your printer. Print on the side where you sprayed the hairspray. Allow time for ink to dry about 30 mins.

Step4: Now your decals are finished. Cut images out, or leave them in sheet form. Press with image side down to any object, use Popsicle stick to rub. Remove backing when transparency sheet turns cloudy from rubbing.

Have fun and happy crafting!

Cheers

Monday, February 02, 2009

Busy, busy as a bee...
I have been busy lately with lots of little projects. My mind is always racing and I think of new and exciting little bits to make everyday! The hard part is keeping everything going smoothly and not getting off coarse.
I have been working on for a while on little sewing kits for the shop. I made one for myself about a year ago, and also sold similar little sewing pouches ( but not pincushion). I think this little duo came out lovely! You can take a peak here or sneak on over to the shop to check out this little guy and more lovelies in the shop!
I am so very excited to share this next tid bit! I have been feverishly working on some patterns this last couple of weeks of all kinds of genres. Some are cute and fun, some are whimsical and wonderful! Here is the first batch of my cute smiley food patterns all on my very own fabric! Yes, you heard right! My own fabric! I am so head or heels for this idea that I am sure you will love them too! I hope to start making some yummy little pouches in the coming days, so do check back!
********
The one thing good about running your own indie business is you have to be a jack of all trades. I mean literally. When every dime of your budget counts, most jobs are left up to you. I find myself learning new techniques, programs and all kinds of info all the time. It also helps your business grow and blossom. That all being said, here are my new Luchador labels. I have been working on them for months trying to get them just right. I decided on this simple graphic card. I made all the art work in photoshop and printed them on a heavy stock on my photo printer. Each Luchador even has a blank name plate, all ready for you to name them! I rather like how they came out. Pretty nifty!


That's all for today. I must get back to my work. I do promise some yummy recipes, and starting this month...DIY How to's!

Cheers for now!
xoxox