
 Happy Tuesday everyone! This weeks tutorial is "How to make a mini book". Now you can use any size paper you wish to make this little book. Actually you can make a big book this way too! I like to make these for my Son using plain old printer paper or scrap paper, but you can use prettier paper.
 Mini book
Step 1 &2: Fold paper in half vertically. Now fold it again horizontally.
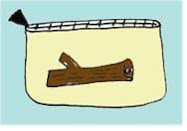
Step 3& 4: Fold paper again vertically. Now unfold paper until your back to step 2 . You should have a piece that is 2 sheets thick and has a cross fold crease in the middle. Using scissors only cut the bottom fold crease when holding the papers horizontally. (See diagram below, cut where thick bold black line is in 2nd diagram)
 Step 5& 6: Unfold the paper entirely. It should look like diagram 5 below. Next Fold the paper in half horizontally with open cut in the center. Hold onto each side and push toward the center. This should push open the cut you made earlier and make a diamond box. Now you should be able to see your mini book coming to life! You can use a glue stick to glue the center pages together.

Perfecto! Now you are ready to start drawing and writing in your mini book! Some wonderful ideas are making the spine out of cute fabric, or laminating the pages. You can even do this to make many pages and make your own flip book!

Well now I must run off and do my daily list of chores. It looks like it may be a beautiful sunny day today, maybe a good day for a walk!
Step 1 &2: Fold paper in half vertically. Now fold it again horizontally.
Step 3& 4: Fold paper again vertically. Now unfold paper until your back to step 2 . You should have a piece that is 2 sheets thick and has a cross fold crease in the middle. Using scissors only cut the bottom fold crease when holding the papers horizontally. (See diagram below, cut where thick bold black line is in 2nd diagram)
 Step 5& 6: Unfold the paper entirely. It should look like diagram 5 below. Next Fold the paper in half horizontally with open cut in the center. Hold onto each side and push toward the center. This should push open the cut you made earlier and make a diamond box. Now you should be able to see your mini book coming to life! You can use a glue stick to glue the center pages together.
Perfecto! Now you are ready to start drawing and writing in your mini book! Some wonderful ideas are making the spine out of cute fabric, or laminating the pages. You can even do this to make many pages and make your own flip book!

Well now I must run off and do my daily list of chores. It looks like it may be a beautiful sunny day today, maybe a good day for a walk!
xoxo


No comments:
Post a Comment